If the images don't show up, just refresh the page or click the thumbs. They're there =]
-Open up a new file of 512x512px
- Select the 'Rectangular Marquee' tool and draw out a rectangle with a Fixed Size of
300px wide by 400px high and fill it with #e3e0e0
- Duplicate the layer and select the 'Gradient Tool' with a 'White to Transparant' gradient.
- Draw out aline from the bottom of the selection to the center of the rectangle.
Do the same from the top of the selection but this time just draw a line to about a third of the selection.
- With the marquee tool selected, right-click in the selection and click 'Layer via Copy'
- Next go to 'Layer' > 'Layer Style' and add an outside stroke of 2px with #b5b3b3 as the color
- Create a new layer and name it 'bottom circle'
- Select the 'Elliptical Marquee' tool and draw out a circle with a fixed size of 200px by 200px
- Possition it as shown in the screenshot below:
Fill it with black
- Go to 'Layer' > 'Layer Style' and change the following settings:
- Also add an outside stroke of 3px with #c0bebf as the color for the stroke
By now, your speaker should look something like this:
- create a new layer and name it 'top circle'
- Select the 'Elliptical Marquee' tool again and draw out a circle with a fixed size of 100px by 100px
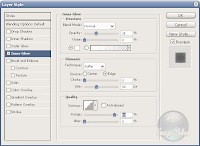
- Go to 'Layer' > 'Layer Style' and apply the same settings as you did for the 'bottom circle' layer. But change the Inner Glow settings as shown below:
- Create a new layer and name it 'bottom inner circle'
- Select the 'Elliptical Marquee' tool again and draw out a circle with a fixed size of 50px by 50px and center it in the 'bottom circle' layer
Fill it with #e6e6e6
Go to 'Layer' > 'Layer Style' and change the following settings:

Also add an outside stroke of 1px with #616061 as the color
Your speaker should look like this by now:
- Duplicate the layer by right-clicking on it and drag it to the center of the 'top circle' layer
- With this layer selected go to 'Edit' > 'Transform' ad select 'Scale'.
Scale it down to 50% of the original size
- Delete your background and background copy layer and merge the remaining layers
- Go to 'Edit' > 'Transform' > 'Warp' and select a 'Bulge' of 25%
You're done and should have this as the final result:
Saturday, March 31, 2007
Create a simple speakerbox
Subscribe to:
Post Comments (Atom)


No comments:
Post a Comment