


In this tutorial I will show you how to create your own software logo.
I chose a logo for an Antivirus, but obviously this tutorial works for other applications as well.
Note: Don't mind the quality of the screenshots. The result looks perfectly smooth in Photoshop.
- Open up a new document of 256x256
- Select the 'Elliptical Marquee Tool' and while holding down 'Shift' draw out a circle and as shown below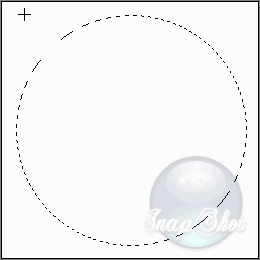
- Fill it with #fcb303
- Right-click on the selected circle you just made and select 'Layer via Copy'
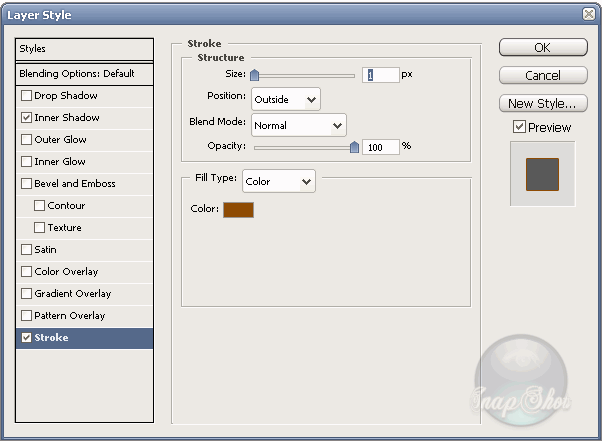
Now go to 'Layer' > 'Layer Style' and change the following settings:
The colour used for the stroke is #8e4b03
- Next, select your Circle with the 'Magic Wand', go to 'Select' > 'Modify' > 'Contract' and give in a value of 5px.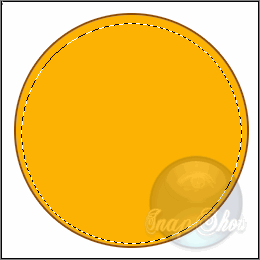
- Select your 'Gradient tool' and choose a 'Radial Gradient' going from white to transparant and draw a line from the bottom of the selection halfway up the contracted circle.
- Then press 'Ctrl+D'
This should give you the following result:
- Create a new layer and name it 'glass_top'
- Select your 'Elliptical Marquee Tool' again and draw out a circle as shown below: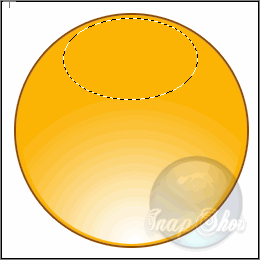
- Select the 'Gradient Tool' again with a liniar gradient going from white to transparant, and draw a line from the top of the selection to the bottom of the selection.
- Press 'Ctrl+D'
This should leave you with the following result: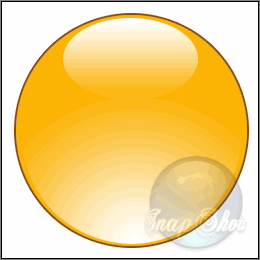
There you go. You just finished the base of your logo.
Next up is the logo itself.
Since this is a tutorial on how to create an antivirus logo, I'm picking a shape that clearly fits the subject.
From here on out you're free to choose whatever shape you want ofcourse.
- Create a new layer (name it 'logo') and select the 'Custom Shape Tool'
- One of the default shapes is a target symbol. 
This is the one I'll be using for this tutorial.
- Select the shape and while holding down 'Ctrl' draw out the logo so that it's evenly sized in width and height.
- Right-click on the layer thumbnail and select 'Rasterize Vector Mask' so you'll be able to move it around and position it in the sphere.
(Select the 'Move Tool' to move the layer around)
- With this layer still selected, go to 'Layer' > 'Layer Style' and change the following settings: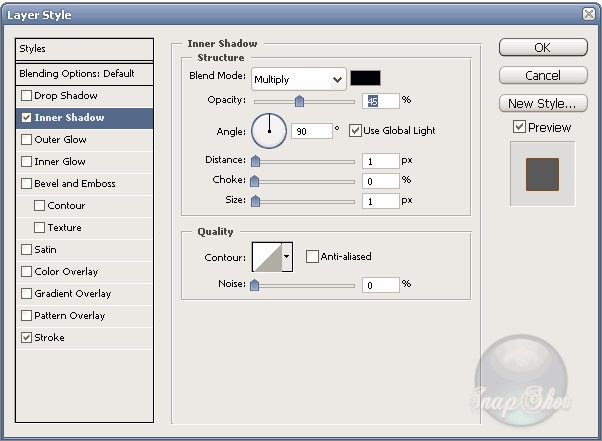
The colour used for the stroke is #8e4b03
All that is left now is to move the layer down so that it's under the 'glass_top' layer and delete the background layer.
If everything went right you now have a nice looking Antivirus software logo.![]()
I hope you liked this one =]
Friday, March 16, 2007
Create your own glossy Software Logo
Subscribe to:
Post Comments (Atom)


No comments:
Post a Comment